Learning Photoshop


I started learning the basics of Photoshop and image manipulation. For this task I took the Stonehenge image and selected the blue and white using color range to get rid of light sky and pasted in the dark sky on a layer underneath. I adjusted the sky slightly to fit the image better.


For the next task I created hybrid animals - one of a deer and fennec fox, and the other of a rat and a bat, using the same technique of selecting the color range I was able to erase the backgrounds in the images. For the fennec fox I adjusted the colors of its fur to match the deer more by adjusting the hue and saturation. For the bat face to match onto the rat body I used the blur tool a bit to smooth out its fur and match on to the rat.


Using the same technique by picking up a color range I was able to remove the green screen from this image and add on a background to it.


For this task I changed the white building image into an apocalyptic building. I did this by changing the sky by selecting the color range and adding a dark sky instead. For the building I used an image of rust as an overlay layer, changed the opacity to create just a bit of a different color on the white building and then added on vines using a leaf brush tool. For the overall image I also changed by hue/brightness/saturation levels to match an apocalyptic look for the image.
Assignment 1 - Fake News


For my fake news task I wanted to edit a picture of a cat onto the picture of a street in Chicago and make the cat really big. Whilst looking for a cat picture I could use I tried looking for once that has a similar perspective to the street image so it could make my edit look a bit more realistic.

To remove the cat from the background in the image I picked it out using color range, but because the cat and background are both white I had to remove some of the image by hand. I also added in some shadow as the sunlight is coming from the back of the buildings so I shaded the front of the cat and the street using the brush tool. I also edited it a bit by bluring the edges of the cat slightly and edited the saturation of the cat too to complete the image.
Learning Maya
_edited.jpg)
.png)
_edited.jpg)
_edited.jpg)
_edited.jpg)
_edited.jpg)
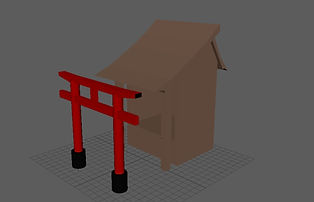
I started learning Maya by making simple shapes and changing the sizes of them. I decided I wanted to create a shinto shire and two gates so I made it using cubes and cylinder shapes, changing the sizes of them and rotating the shapes for the roof. I then learned how to add divisions on the shapes and I was able to delete the bits sticking out from the roof and curve it slighly and curve the top of the gate too. I assigned a Lambert to the shapes to add color and also duplicated my gate and made it smaller so I could have two identical ones but different sizes.
_edited.jpg)
_edited.jpg)
_edited.jpg)
_edited.jpg)
For this task I began creating spaceships manipulating a simple square shape after I added in divisions.
_edited.jpg)
_edited.jpg)
_edited.jpg)
_edited.jpg)
_edited.jpg)
For the next one I learned how to extrude parts of the shape and using symmetry I could do the exact same thing on the other side of the shape to create a symmetrical spaceship.
.png)
.png)
.png)
.png)
For this task I started modelling a mug and started it off with a simple cylinder shape, adjusted into more of a mug shape and then deleted the top face of the cylinder, using extrude I was able to make the shape thicker and then bevelled the edges.
.png)
.png)
I then made the handle from a torus shape and adjusted the amount of divisions, and like this I was able to delete the parts I don't need inside the mug.
.png)
.png)
.png)
.png)
.png)
To attach the handle onto my mug shape I created edge loops on the shape where the handle is, deleted the space for the handle and then using weld I was able to bring the handle into the shape. The last image is a smoothed out view of the mug I made.
.png)
.png)
.png)
.png)
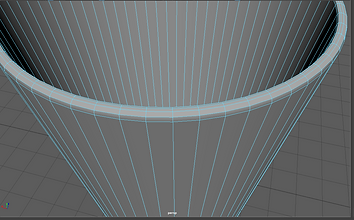
For this task I made a wine glass. I started by drawing half of the wine glass shape using the CV curve tool and then using revolve I was able to revolve the shape around into a wine glass shape and then changed some tessellation options to make it a 3D shape.
.png)
.png)
.png)
I then was able to duplicate this shape and adjust my wine glass a bit. With this I made two other bigger variations of the wine glass.
_edited.jpg)
_edited.jpg)
_edited.jpg)
_edited.jpg)
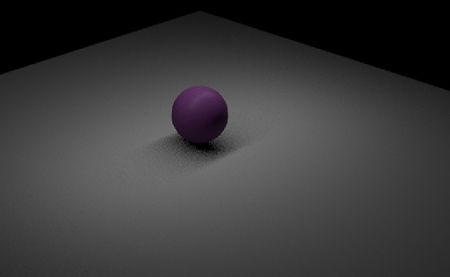
After installing Arnold renderer for Maya I was able to experiment with lights and AI Standard Surface. Here I was trying out area lights and skydome light.
_edited.jpg)
_edited.jpg)
_edited.jpg)
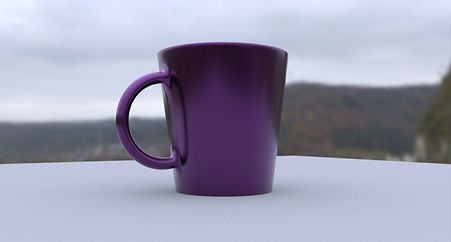
I imported the mug model I made into Maya and assigned AiStandardSurface on it which I made purple. The skydome light I changed so that the background could be an outdoor scene with plently of light to reflect on the mug. I experimented with the settings of the AiStandardSurface such as the metalness, specular and sheen.
Assignment 1 - Part 2 - Bond Gadget
_edited.jpg)
_edited.jpg)
_edited.jpg)
For the assignment to create a James Bond style gadget I made a cigarrete box that slides out into a camera. For this I downloaded images of a cigarrete box packaging and cigarette tips to use as textures on my model. When I uploaded the packaging image onto the AiStandardSurface I had to adjust the UV to fit the box which I did with UV editor.
.png)
.png)
I downloaded textures from Quixel Megascans that I can use for my next assignment and in Quixel Mixer I blended two wall textures together and added a graffiti tag to create a unique texture.
Assignment 2 - Part 1 - New York Rooftops
_edited.jpg)
_edited.jpg)
_edited.jpg)
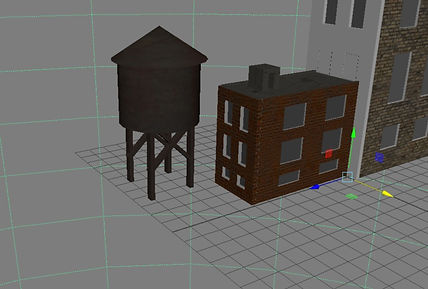
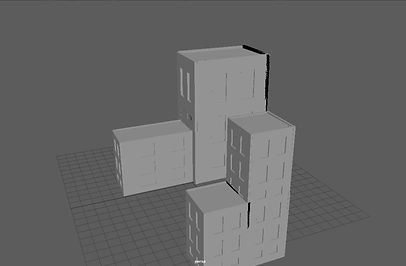
I started creating my New York rooftop scene by making a simple tall building and then duplicating it and changing its dimensions. To add textures onto my buildings I had to seperate the UV shells so that I could assign textures only to specific parts of the building, I also had to adjust the size of the textures on UV editor. I also made a water tank structure for my scene.


Assignment 2 - Part 2 - Time Leap
.png)

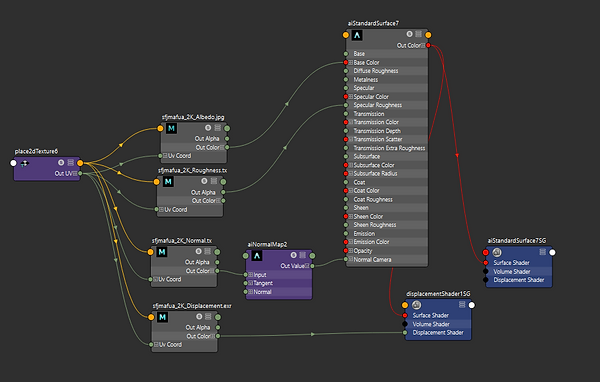
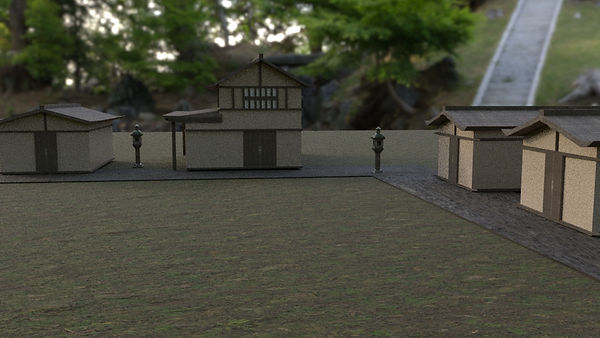
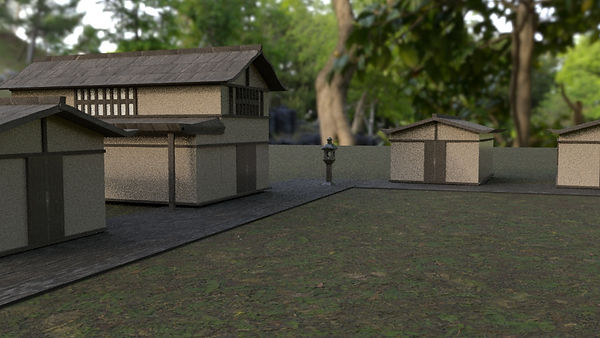
For the time leap assignment I wanted to create a scene set in a small village in Edo period Japan. I started off by creating a house and texturing it with white concrete and dark wood. To make my textures a bit more realistic for a house I added in roughness, normal map, and displacement into the hypershade. To add to the scene I created another sort of smaller house, added in a grass and stone flooring, and added stone lanterns which I downloaded the model for.